If you're not using Cloudflare for all of your sites, what are you doing?
The best feature they have is a built-in Proxy/CDN which will serve static assets from their edge network. If you're assets are correctly configured this will offload number of network requests to you server, reducing total traffic.
It's important to remove static assets requests from your server, or your server will need to serve every page, CSS or JS, which will increase number of processes and possibly consume all your workers.
There are cases online where people had to pay $100K bills for hosting static sites, since they did not have any CDN configured:

Cloudflare has a very generous free plan, and for 99% of sites that's all you need.
Cloudflare Proxy turn ON
When you add your site to Cloudflare in DNS settings there is on/off switcher for turning Cloudflare Proxy.
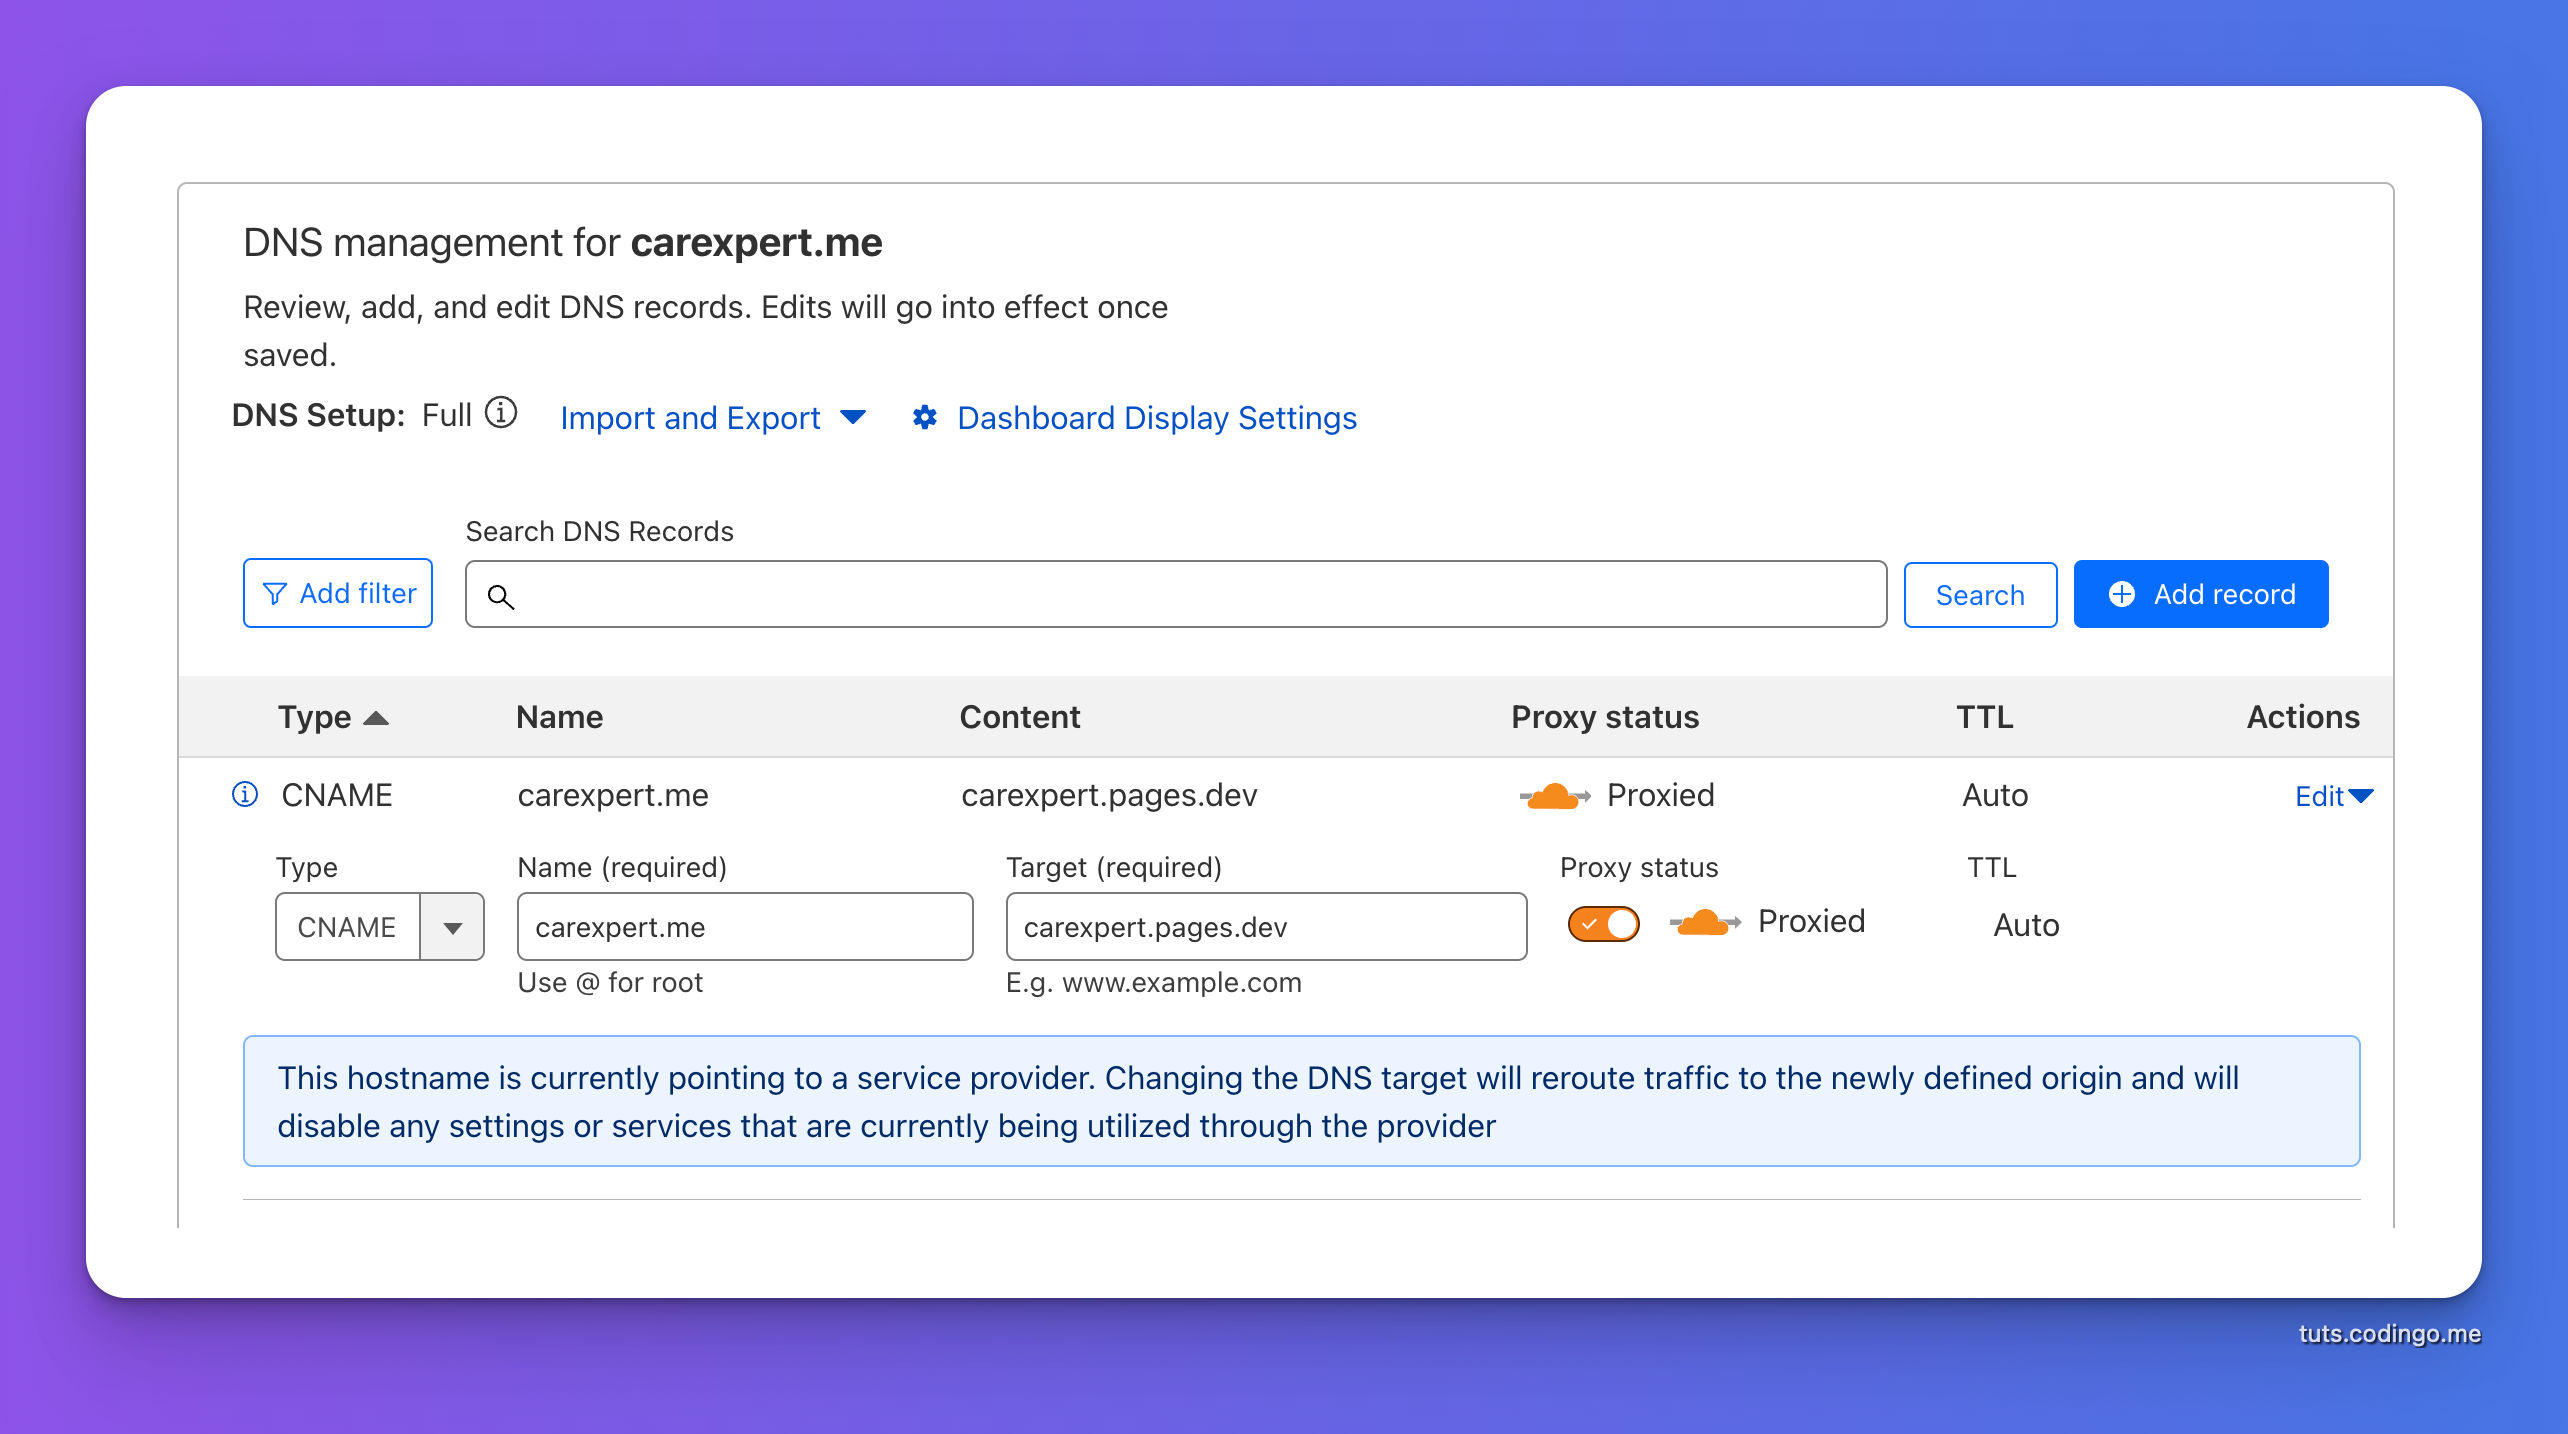
This means Cloudflare will hide your Origin server IP, plus it'll cache all static assets. Inside Caching -> Configuration you can see all caching settings.
What happens when new application build is live
After compiling assets content of JS and CSS file could change. Some frameworks have cache busting which will force visitor browsers to download the latest version of assets.
Others don't have this feature or it may not function properly.
You want to avoid cases where old assets are cached since that could mess your entire app.
Manual Cache Purging
In Cloudflare Caching Configuration page there is a button which will purge entire cache or specified paths.
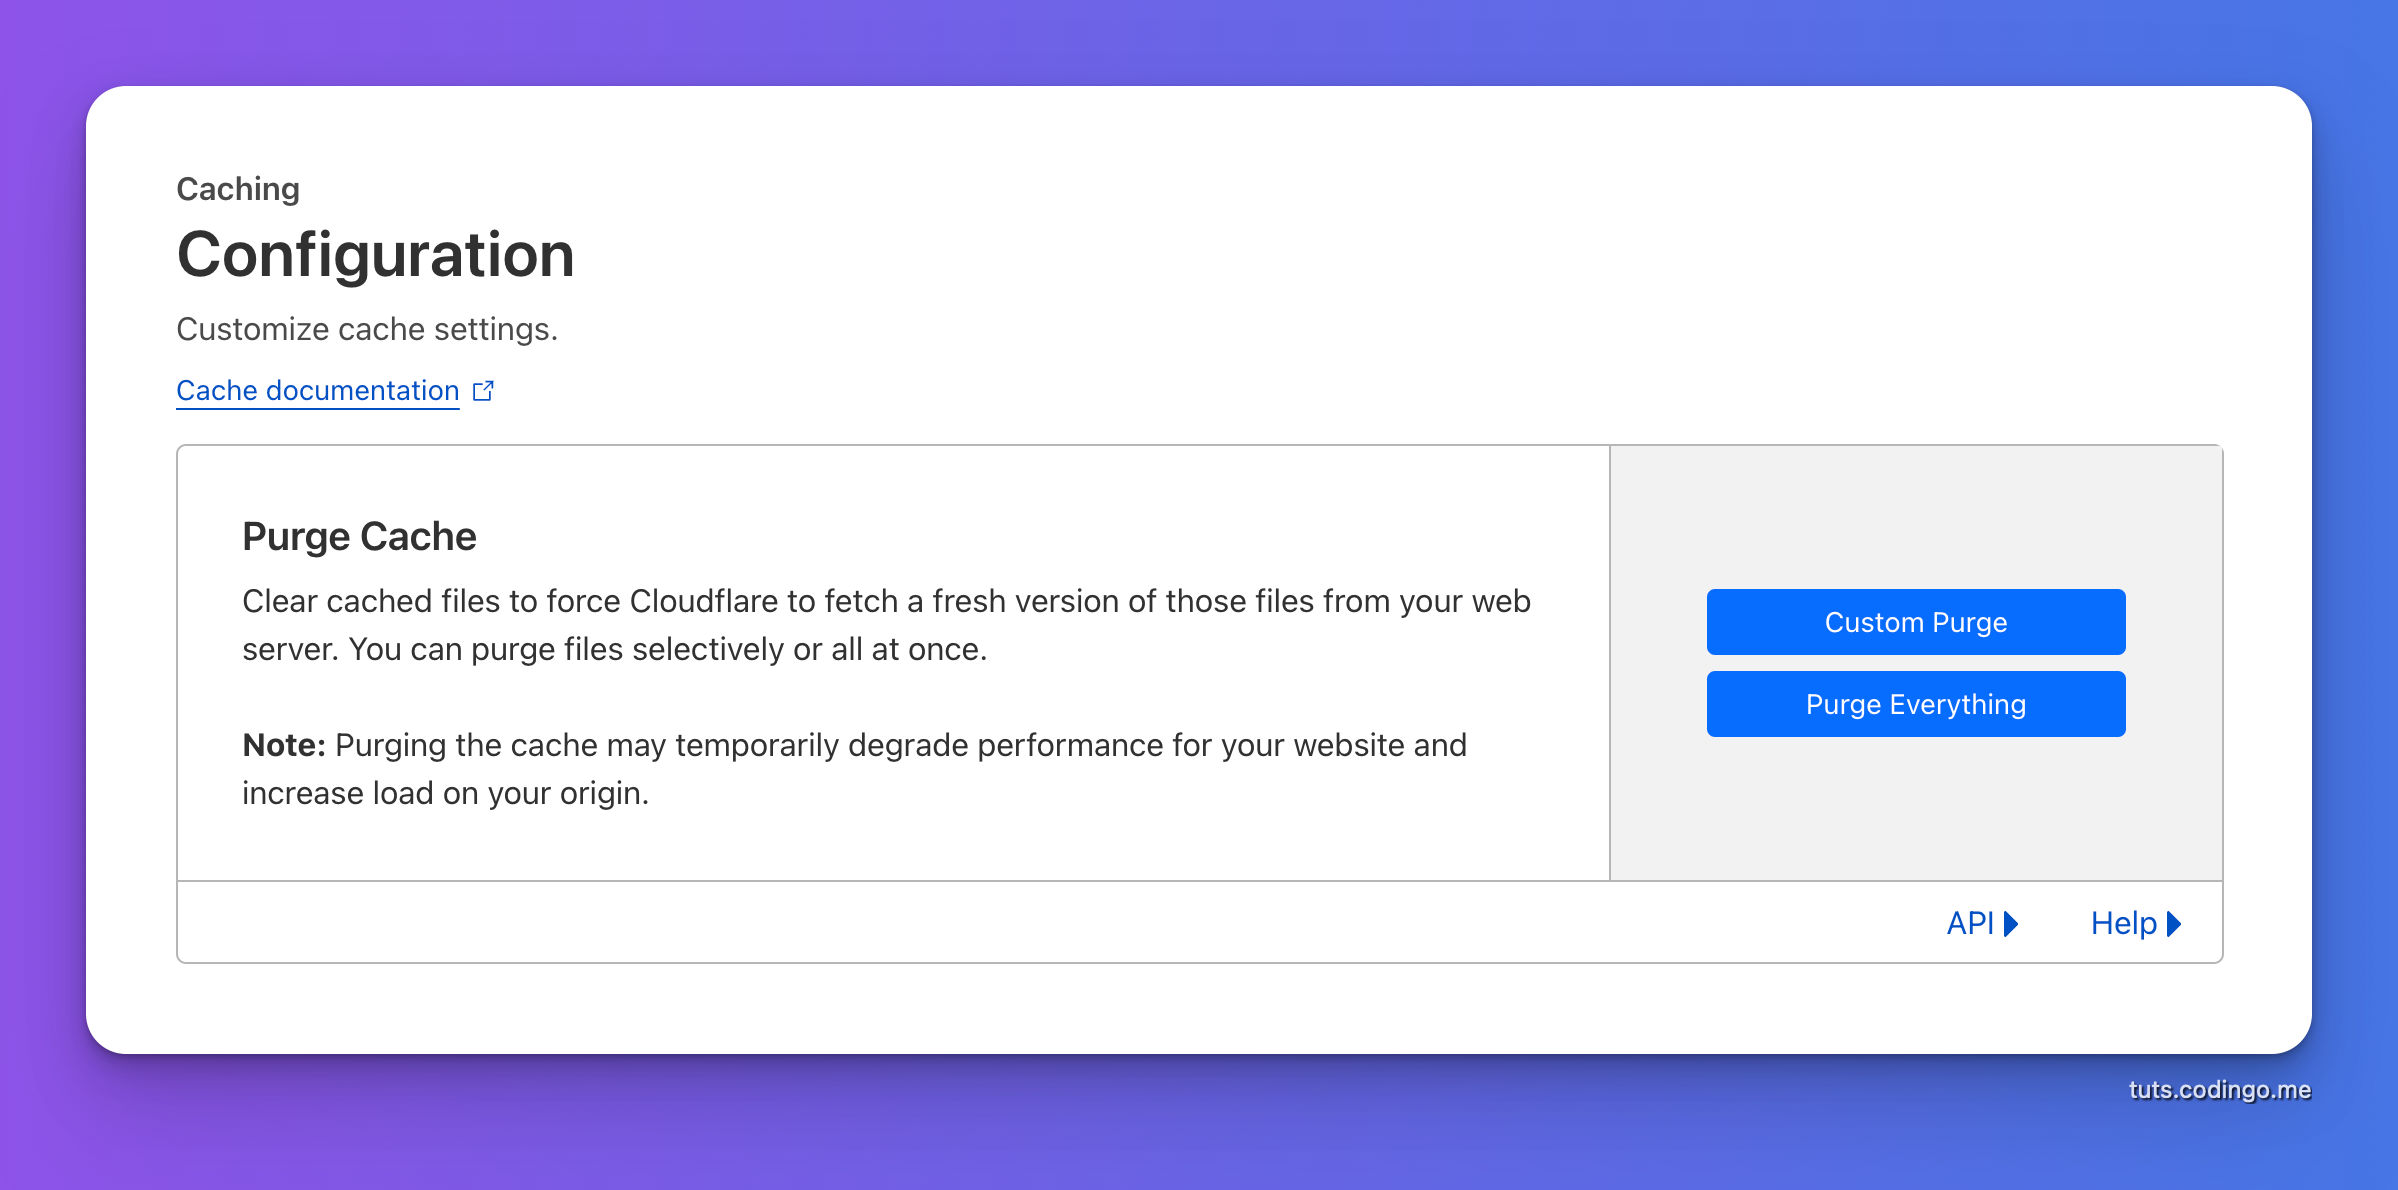
During development clicking this button is fine, but for production you need something on auto-pilot.
Automatic Cloudflare Cache Purging
Using Cloudflare API you can clear cache.
Options for calling Cache API
Purge_cache API is a simple POST request and it could be called from any programming language, framework or a simple CURL.
Example of Automatic Cache Purging using Laravel Command
In terminal lets create this command:
php artisan make:command CloudflarePurge
Inside the command class:
<?php

namespace App\Console\Commands;

use Illuminate\Support\Facades\Http;
use Illuminate\Console\Command;

class CloudflarePurge extends Command
{

    protected $signature = 'app:cloudflare-purge';

    protected $description = 'Purge Cloudflare Cache.';

    public function handle()
    {
        Http::withHeaders([
            'Content-Type' => 'application/json',
            'Authorization' => 'Bearer ' . config('services.cloudflare.token')
        ])
        ->post('https://api.cloudflare.com/client/v4/zones/' . config('services.cloudflare.zone') . '/purge_cache', [
            'purge_everything' => true
        ]);
    }
}
This command relies on 2 configuration variables from services.php config file:
   'cloudflare' => [
        'token' => env('CLOUDFLARE_TOKEN'),
        'zone' => env('CLOUDFLARE_ZONE')
    ]
Zone ID is visible on domains Overview page, just scroll down and look into right sidebar.
Token could be created from Profile page, choose API tokens.
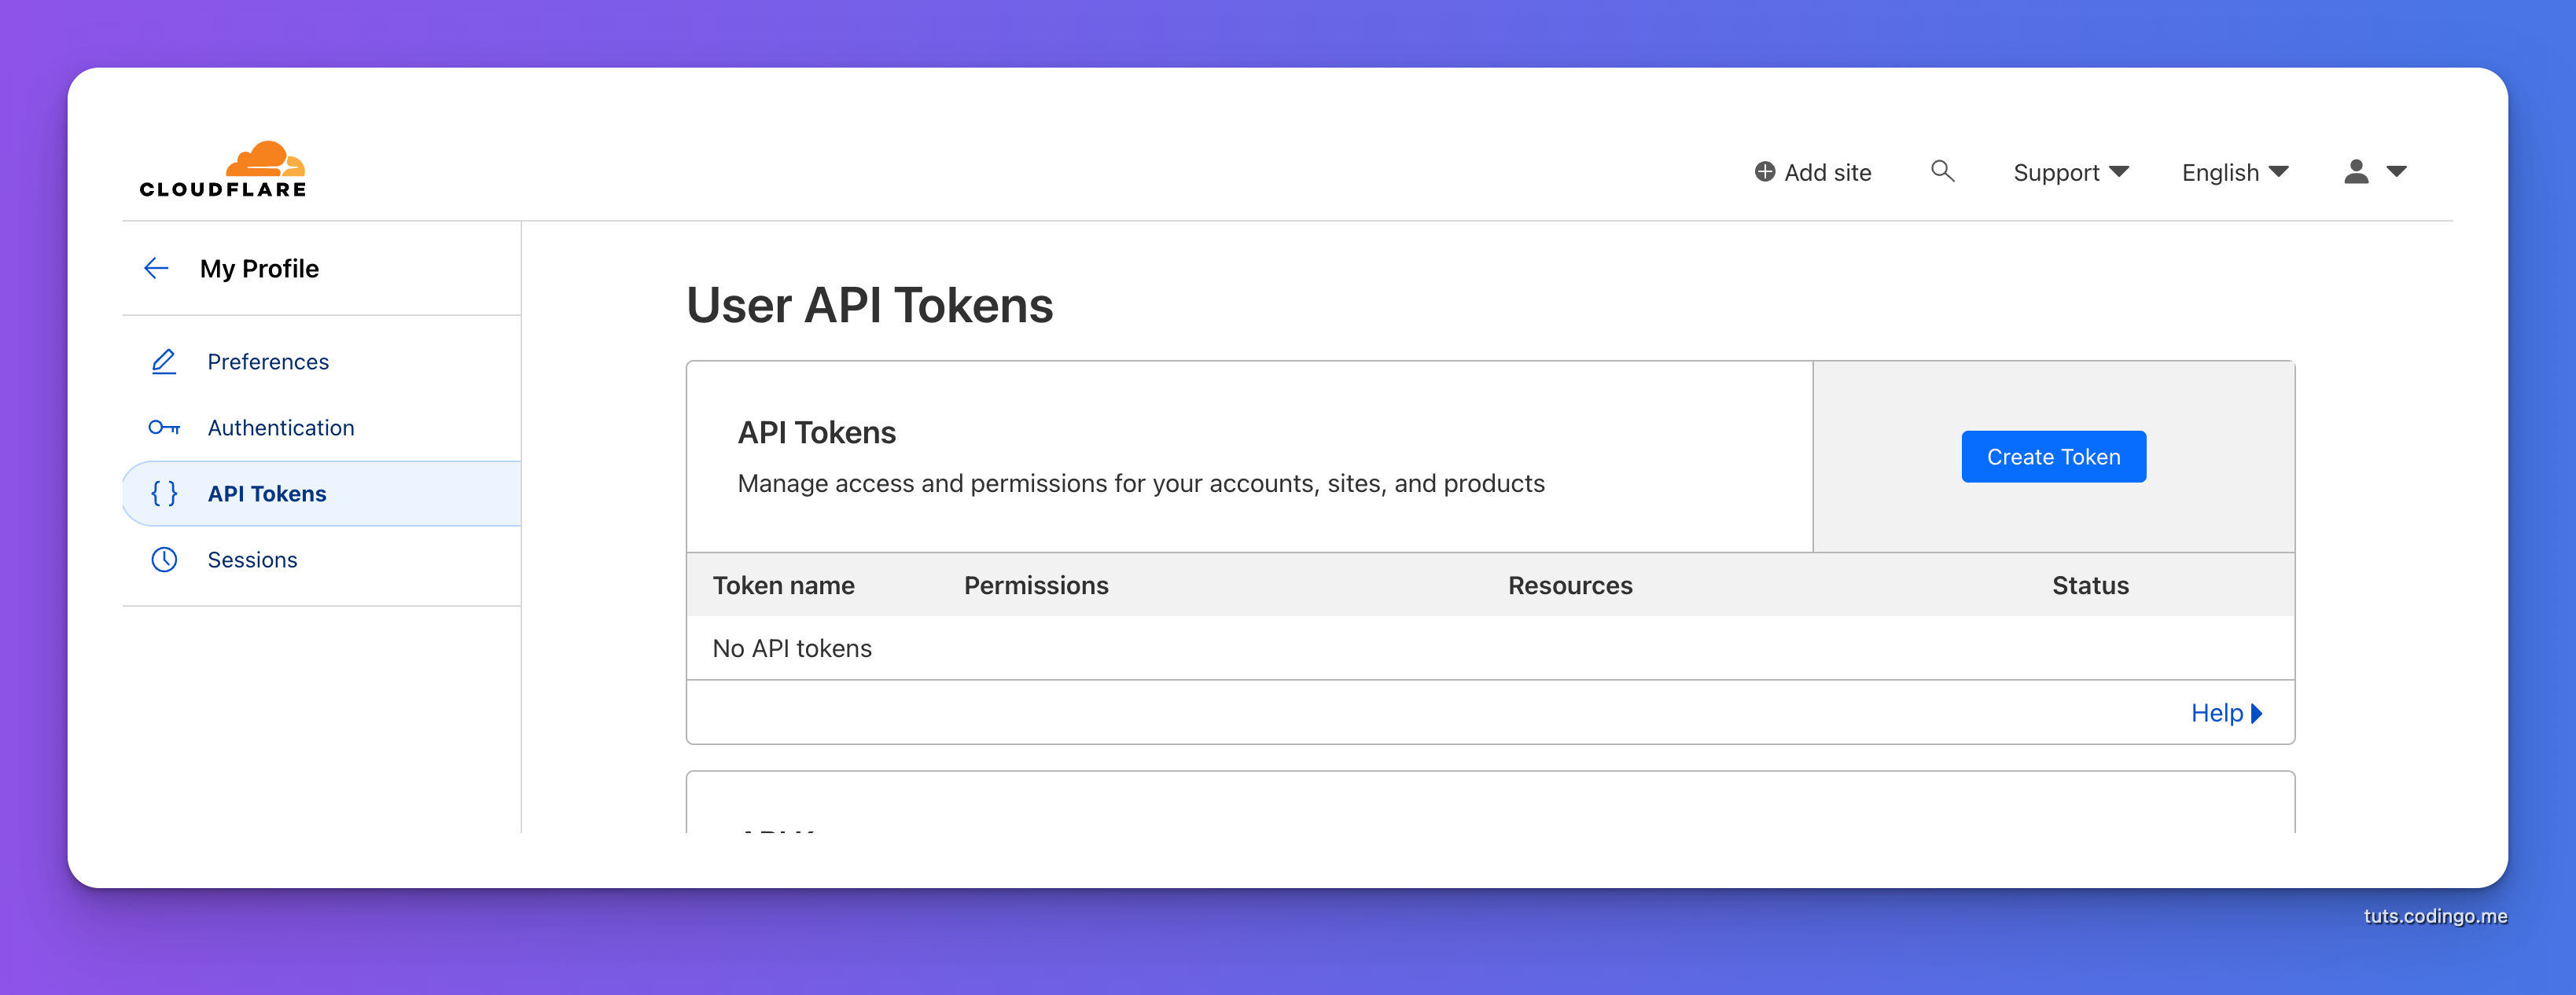
On this page create new token.
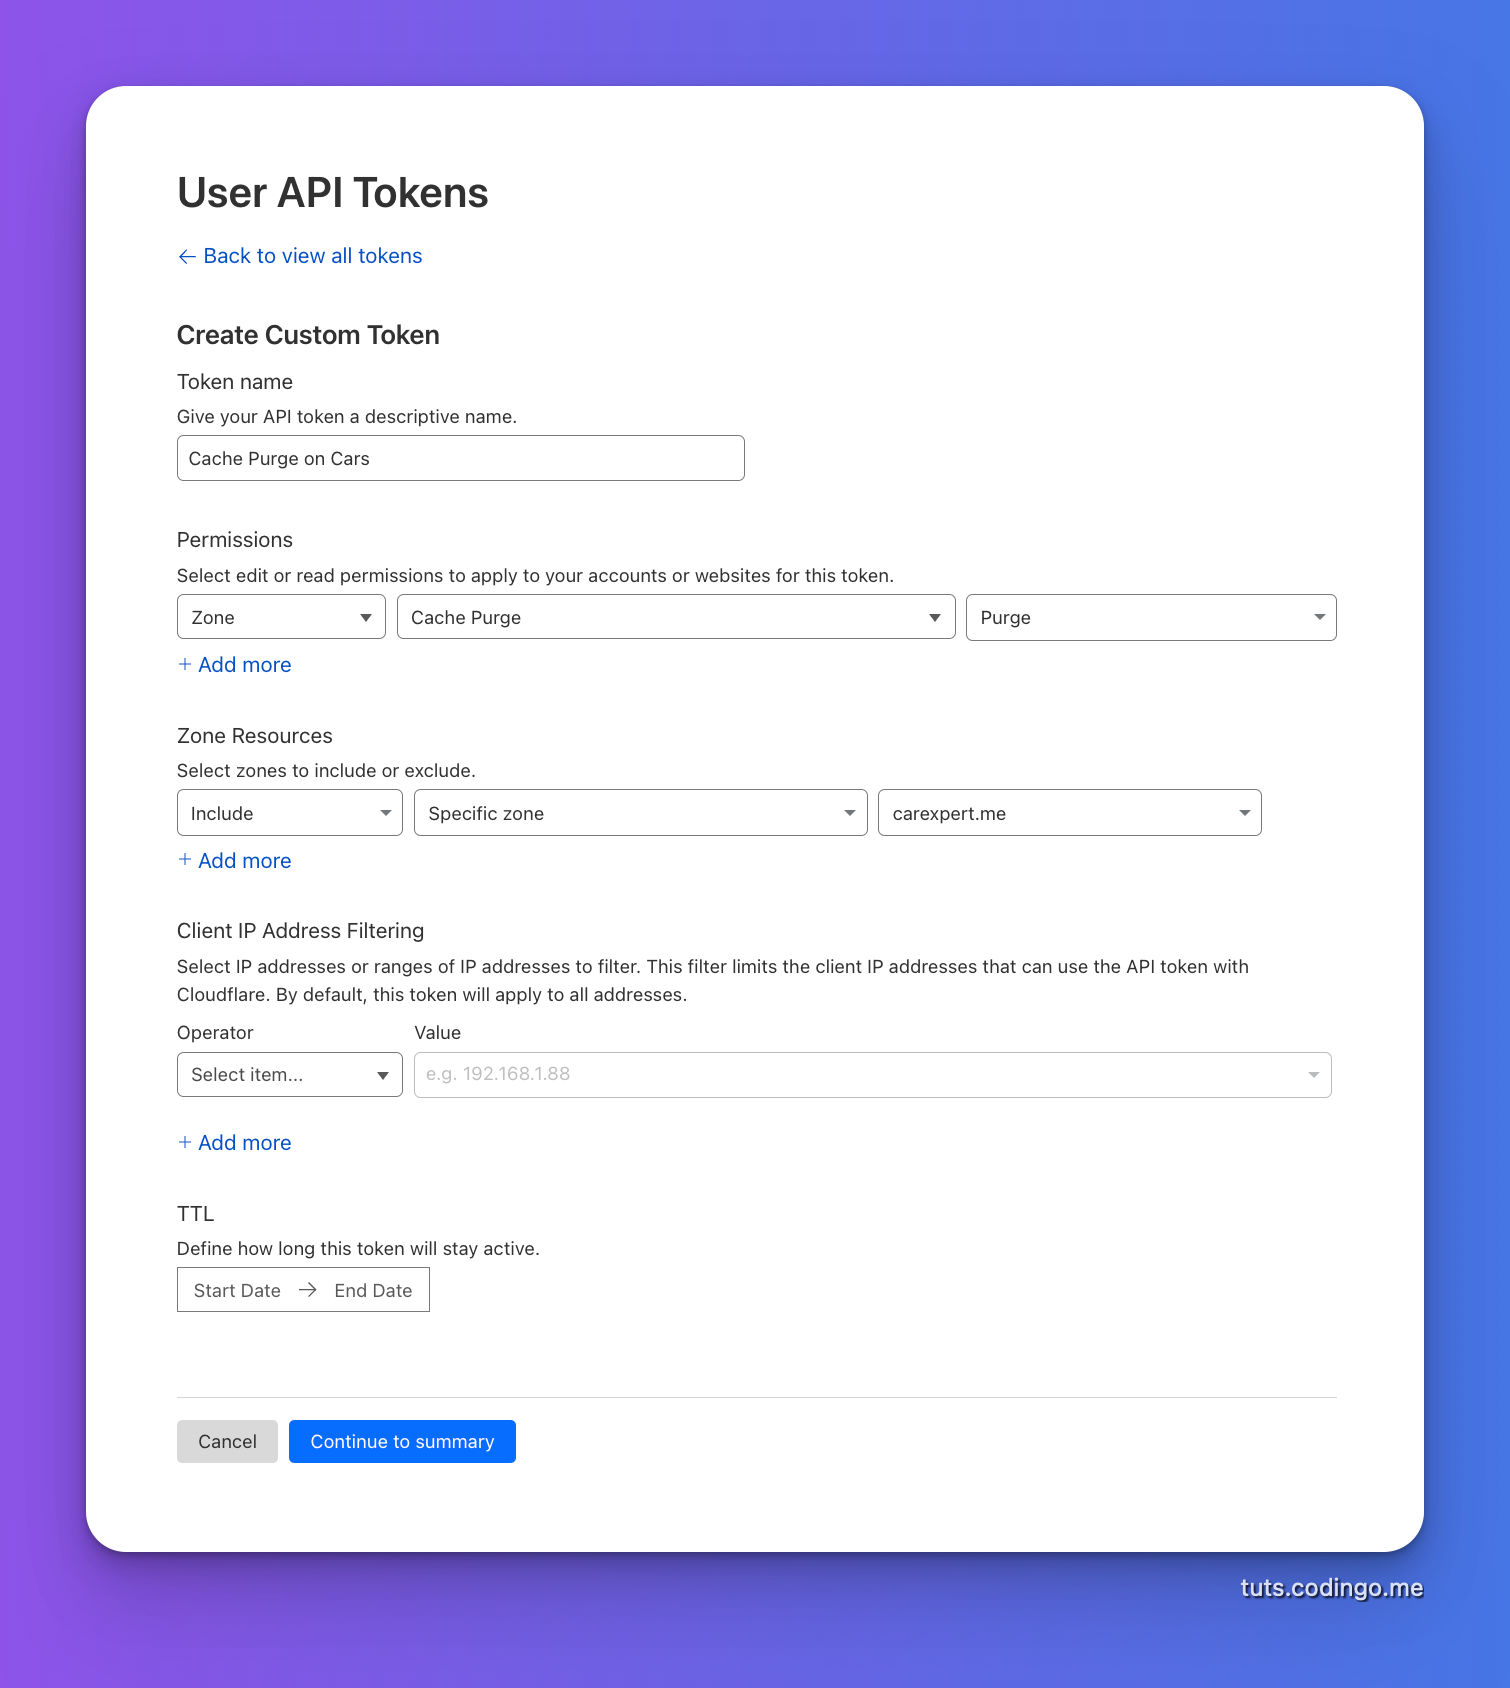
There is a number of options for API tokens I like to lock them based on the type of resource, zone, site and IP, example:
Calling purge command
If you're using something like Laravel Forge you can call command directly there.
In case you're deploying from GitHub actions it's a good idea to create protected route for purging cache, and then call that route from the Action.
Conclusion
In this tutorial you saw how easy it is to configure automatic cache purging using Cloudflare.
Now your sites will always serve fresh assets!